|
||
How to Paint Portraits in Watercolor |
||
Lesson 21 (also see Figures and Faces for videos)
|
||
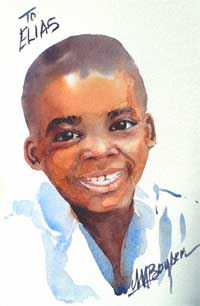
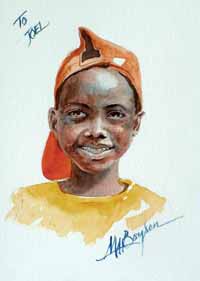
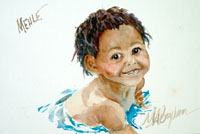
Quick tip: When you don't want your brush strokes to show, wet the area with clear water, then when you add pigment it will flow smoothly over the area. This is especially helpful in painting portraits. I have never considered myself a portrait artist, but I have taken classes in the subject. I surprised myself, when asked to paint portratis of the children at an AIDS hospice in South Africa. They actually look like the children! Of course, people of color have more color in their faces and it is fun to paint them Painting portraits in watercolor is a challenging adventure. However, they can be more delicate than those painted in oils. I had the chance to paint patients in a South African Hospice who wanted a tangible visiion of themselves to leave to their children. It was a daunting experience! After painting several of the dying patients, they asked me if I would paint their children. Then more children wanted to be painted and I spent hours capturing their likeness on paper. Starting with the eyesIf you don't get the look in their eyes, you will not succeed with the rest of the likeness. This little boy, named Elias (pronounced Ell'ius) has very wideset eyes. I was very interested in painting his face to see if I could capture his face. It was important to keep edges soft because this is the face of a child. I began with the eyes as I stated, and when it came time to get to details, I carefully measured the length of the nose agains the width of the eyes. The length of the nose (from the eyebrows to the tip) is the exact distance between the irises of his eyes. This is the way I am able to paint without drawing. I establish the size and the distances of adjacent objects. So, in measuring one painted item, I am able to establish the size of another object. For color I notice the colors around a face. There is much reflected light in a face and the skin tones, no matter what the nationality. I painted these children outside but in the shade. Even then, the blue color of the sky tinted the tops of their heads, so I added a blue to the palette of skin tones. Look at the color of the water reflections on this little boy named Mehle (pronounced Mek-lay). Remember when painting faces in watercolor, it is advisable to paint the surface surrounding the eyes and all the way to the chin with clear water, so that your colors, when applied will flow softly, leaving no hard brush strokes. Faces also receive reflected light from sources around them. This next portrait is of a young South African girl whose skin is very black. However, with the yellow hat on her head and the strong South African light filtering through, her skin turns a bit light and yellow. SIt was amazing to see the transformation. I could actually see her features better with the hat on than off. You can also see the reflectiong of the blue sky on her shoulders.
<<Return to Lesson 20, Snowy Landscape Related topics: Return to Watercolor Painting tips See my 20 videos on YOUTUBE. |

Send comments or
questions about the artwork to art@maboysen.com
Copyrightę 1996-1997 M.A.
Boysen Enterprises, Inc.
Original site design by Michael Adam Boysen


